
Using Kubernetes with Docker for Mac
January 30, 2018
If you just awoke from a few months worth of slumber (three months to be exact), this might be a bit of a shocker—Kubernetes? On Docker? So, yes—last October Docker announced at DockerCon Europe that future EE versions are going to support Kubernetes integration.
This has been somewhat of a big topic for debate in the world of containers and orchestration, and for good reason. Since Docker offers an orchestration tool of its own, Docker Swarm, this move has given rise to article titles such as “Docker give into the inevitable” or “Kubernetes has won.”
While one can argue about the unequivocal tone used in these titles, there is little doubt that 2017 was a watershed year for Kubernetes, and in many ways for Docker as well. The announcement signified a major strategic decision by Docker, and it was followed up by the release of Docker for Mac with Kubernetes a few weeks ago.
What does this release mean?
Well, you can now build their containerized applications and deploy them to Kubernetes, locally and on the same Docker instance. As part of the deal, you get a single-node Kubernetes cluster using the latest version of Docker as the container runtime, and the ability to deploy to Kubernetes using Docker Compose or Kubernetes manifest files.
This article reviews this new release and takes you through some steps to get a simple demo application running–and yes, there is some logging involved as well.
Downloading and installing Docker for Mac
For now, Kubernetes is only available on Docker for Mac 17.12 CE Edge (special Docker version for new and experimental features), so make sure you install the Edge version.
On your Mac, double-click the Docker.dmg file and begin the installation process as instructed.
This process takes a few minutes, at the end of which Docker is installed and launched. You will also see the little Docker whale icon appear at the top of your Mac’s screen. Open your terminal and enter the docker info command to verify.
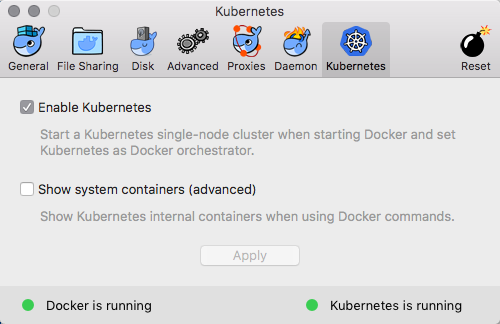
Kubernetes is not enabled by default. To enable it, click on the Docker icon, go to Preferences | Kubernetes, select the Enable Kubernetes checkbox and hit Apply.
After a few minutes, Kubernetes will be enabled, as reflected by the green statuses at the bottom of the preferences dialog.
Exploring our Kubernetes installation
Let’s enter some kubectl commands to find out more about the installation.
We’ll start with:
kubectl version

Client Version: version.Info{Major:"1",
Minor:"8", GitVersion:"v1.8.2",
GitCommit:"bdaeafa71f6c7c04636251031f93464384d54963",
GitTreeState:"clean", BuildDate:"2017-10-24T19:48:57Z",
GoVersion:"go1.8.3", Compiler:"gc", Platform:"darwin/amd64"}

Server Version: version.Info{Major:"1", Minor:"8",
GitVersion:"v1.8.2",
GitCommit:"bdaeafa71f6c7c04636251031f93464384d54963",
GitTreeState:"clean", BuildDate:"2017-10-24T19:38:10Z",
GoVersion:"go1.8.3", Compiler:"gc", Platform:"linux/amd64"}
Next, let’s find out about the single-node cluster:
kubectl cluster-info

Kubernetes master is running at https://localhost:6443
KubeDNS is running at https://localhost:6443/api/v1/namespaces/kube-system/services/kube-dns/proxy
And:
kubectl get nodes

NAME                 STATUS    ROLES     AGE       VERSION
docker-for-desktop   Ready     master    1d       v1.8.2
For management purposes, I’m also going to install the Kubernetes dashboard:
kubectl apply -f https://raw.githubusercontent.com/kubernetes/dashboard/v2.0.0-rc7/aio/deploy/recommended.yaml
And the result:
namespace/kubernetes-dashboard created
serviceaccount/kubernetes-dashboard created
service/kubernetes-dashboard created
secret/kubernetes-dashboard-certs created
secret/kubernetes-dashboard-csrf created
secret/kubernetes-dashboard-key-holder created
configmap/kubernetes-dashboard-settings created
role.rbac.authorization.k8s.io/kubernetes-dashboard created
clusterrole.rbac.authorization.k8s.io/kubernetes-dashboard created
rolebinding.rbac.authorization.k8s.io/kubernetes-dashboard created
clusterrolebinding.rbac.authorization.k8s.io/kubernetes-dashboard created
deployment.apps/kubernetes-dashboard created
service/dashboard-metrics-scraper created
deployment.apps/dashboard-metrics-scraper created
Since the dashboard pod is deployed under the kube-system namespace, I’m going to use the following command to see the pod:
kubectl get pods --namespace kube-system


NAME                          READY   STATUS    RESTARTS   AGE
coredns-6955765f44-kxqmm      1/1     Running   0          1d
coredns-6955765f44-mtwx5      1/1     Running   0          1d
etcd-m01                      1/1     Running   0          1d
fluentd-logzio-cskdg          1/1     Running   0          1d
kube-apiserver-m01            1/1     Running   0          1d
kube-controller-manager-m01   1/1     Running   0          1d
kube-proxy-sctqh              1/1     Running   0          1d
kube-scheduler-m01            1/1     Running   0          1d
storage-provisioner           1/1     Running   0          1d
Next, I’m going to configure port forwarding for the pod (be sure to change the name in the command):
kubectl port-forward kubernetes-dashboard-7798c48646-ctrtl 8443:8443 --namespace=kube-system

Forwarding from 127.0.0.1:8443 -> 8443
We can now access the dashboard at https://localhost:8443 (just skip the warning messages that are displayed).
Deploying a demo application to Kubernetes
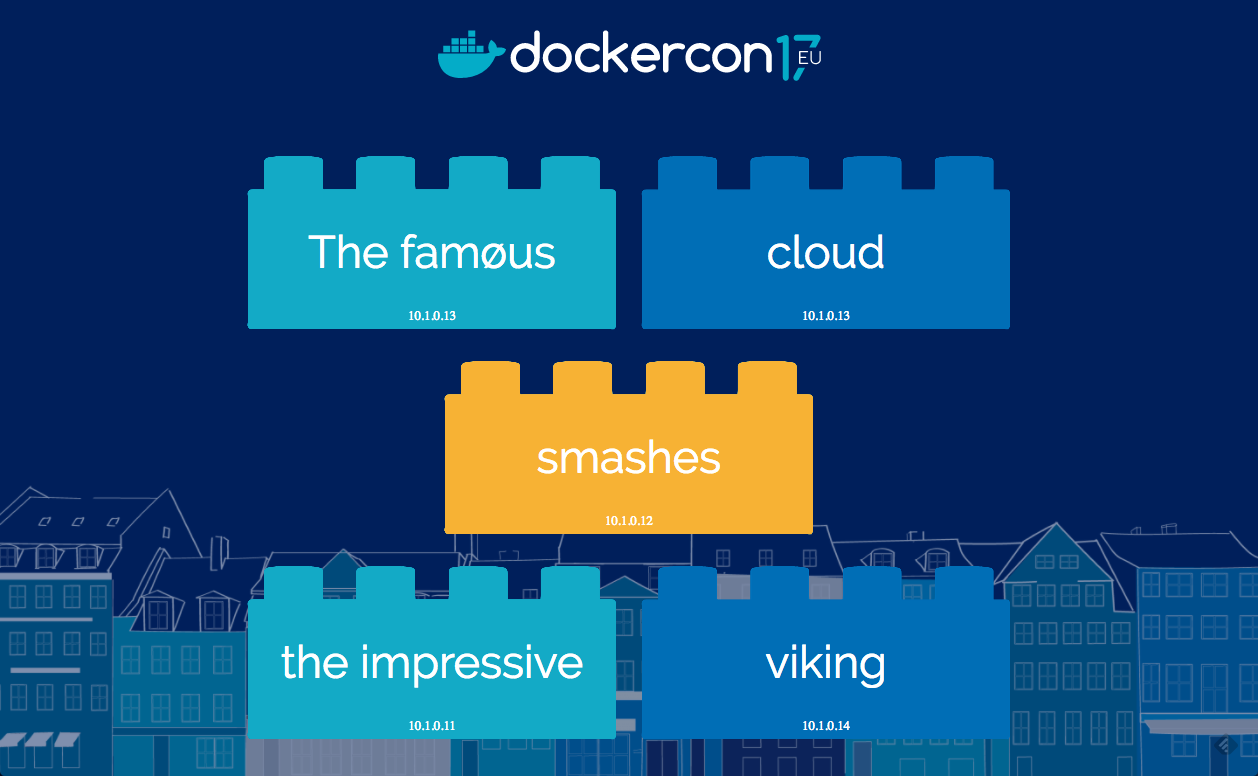
It’s time to deploy a demo application. I will use the demo application used for the announcement at DockerCon Europe, which includes three containers — a Postgres database, a Java REST API for reading from the database and a simple Go app that calls the API to build cute sentences.
To deploy, we’re first going to clone the app:
git clone https://github.com/dockersamples/k8s-wordsmith-demo
We are then going to use Docker Compose to build the project:
cd k8s-wordsmith-demo
docker-compose build
This will take a few minutes, but once done, all we have to do to deploy to our Kubernetes cluster is use the supplied manifest:
kubectl apply -f kube-deployment.yml
Let’s review the deployed services:
kubectl get svc

NAME         TYPE           CLUSTER-IP      EXTERNAL-IP   PORT(S)          AGE
db           ClusterIP      None            <none>        5432/TCP         2h
kubernetes   ClusterIP      10.96.0.1       <none>        443/TCP          10d
web          LoadBalancer   10.105.194.57   <pending>     8081:32218/TCP   2h
words        ClusterIP      None            <none>        8080/TCP         2h
We can now browse to http://localhost:8081 to see the beautiful app in action in our browser:
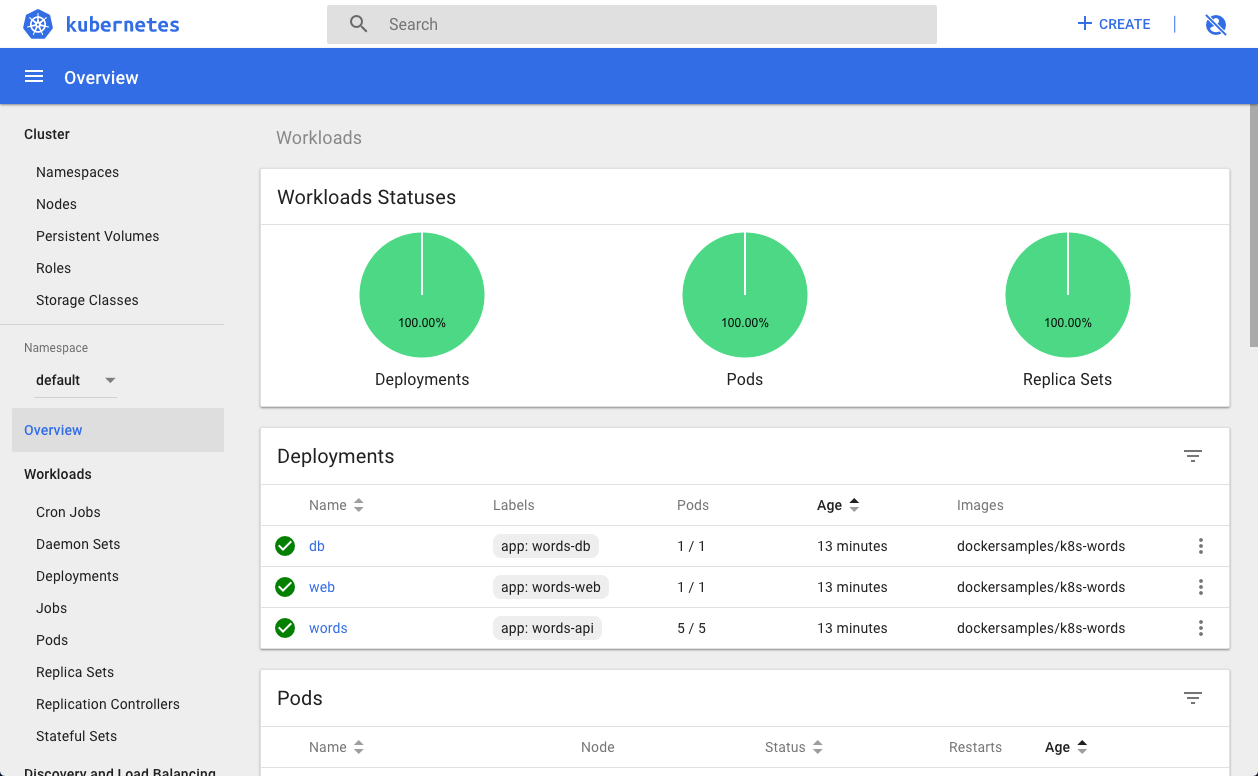
The Kubernetes management dashboard will now show the relevant information about the deployment:
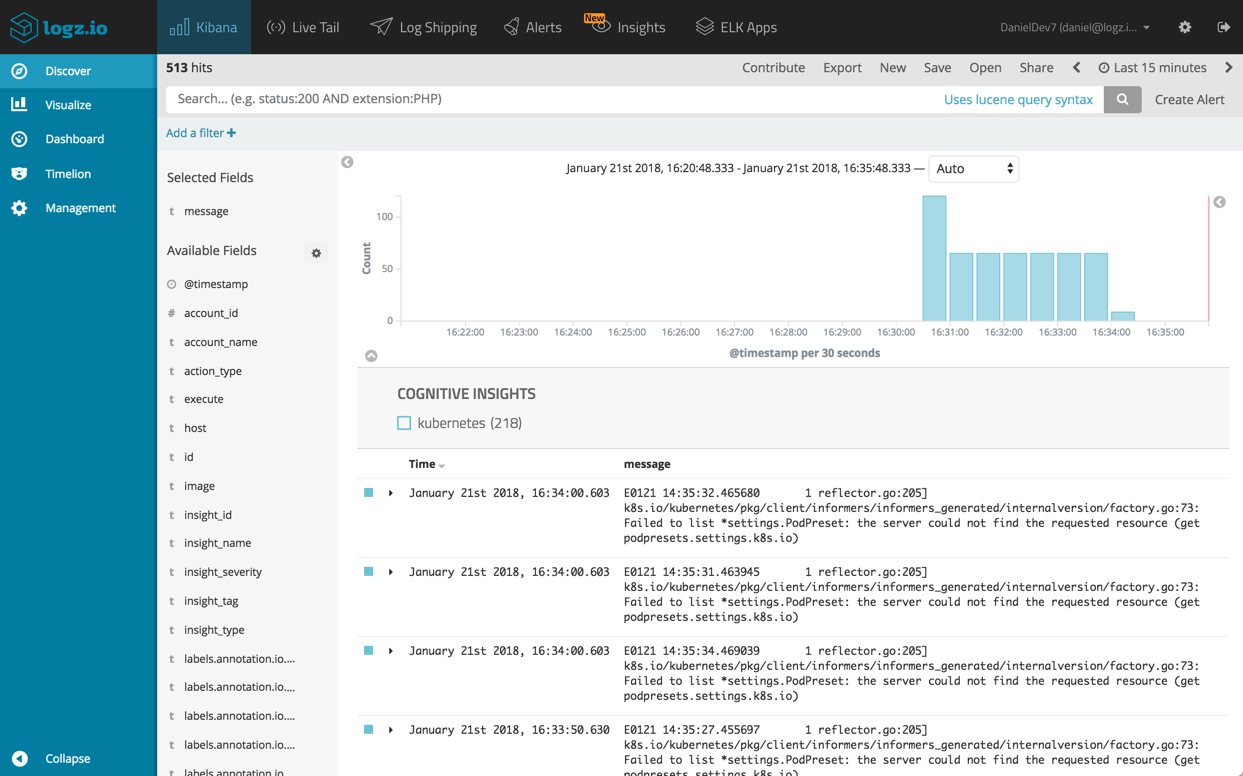
Adding logging into the mix
You didn’t think I would end this article without mentioning logging, did you? Let’s take a look at a simple way to hook up our newly installed Kubernetes with Logz.io for a simple logging workflow (feel free to skip to the summary if logging is of no interest).
To do this, we will use the Docker log collector created by Logz.io. This lightweight Docker container will ship container logs, as well as Docker stats and daemon events. In production, you will need to use it per cluster node, but in our case we only have one node so it’s an easy and quick fix.
Create a manifest file, and use the following example (insert your Logz.io token where relevant):
sudo vim logzio.yml

---
kind: Pod
apiVersion: v1
metadata:
  name: logzio-docker-logs-shipper
  namespace: kube-system
  creationTimestamp:
  labels:
    component: logzio-docker-logs-shipper
spec:
  containers:
  - name: logzio-docker-logs-shipper
    image: logzio/logzio-docker
    imagePullPolicy: IfNotPresent
    resources:
      limits:
        cpu: 100m
        memory: 128Mi
      requests:
        cpu: 20m
        memory: 64Mi
    args:
    - "--token=<LogzioToken>"
    - "-a env=dev"
    - "--no-secure"
    - "--endpoint=listener.logz.io"
    - "--matchByName=.*"
    env:
    - name: HOSTNAME
      value: kube-for-mac
    volumeMounts:
    - mountPath: /var/run/docker.sock
      name: dockersock
  volumes:
  - name: dockersock
    hostPath:
      path: /var/run/docker.sock
Create the manifest:
kubectl create -f logzio.yml

pod "logzio-docker-logs-shipper" created
Within a few seconds, the container will be running under the kube-system namespace:
kubectl get pods --namespace kube-system

NAME                                         READY     STATUS             RESTARTS   AGE
etcd-docker-for-desktop                      1/1       Running            0          1d
kube-apiserver-docker-for-desktop            1/1       Running            0          1d
kube-controller-manager-docker-for-desktop   1/1       Running            0          1d
kube-dns-545bc4bfd4-rrlgf                    3/3       Running            0          1d
kube-proxy-bjsjw                             1/1       Running            0          1d
kube-scheduler-docker-for-desktop            1/1       Running            0          1d
kubernetes-dashboard-747d579ff5-vhkl7        1/1       Running            0          3h
logzio-docker-logs-shipper                   1/1       Running            0          1m
Endnotes
More than anything, the main benefit of this release is making Kubernetes more accessible. The installation and setup process is seamless. In just a few minutes, you can have a Kubernetes cluster, albeit consisting of a single node, up and running in your local dev environment. With all due respect to Minikube, Docker for Mac with Kubernetes is probably one of the easiest ways to set up a Kubernetes dev environment.More on the subject:
It will be interesting to see where Docker takes this in 2018. What will happen to Docker Swarm? There are still plenty of Swarm users out there. The ability to deploy Docker stacks to Kubernetes will help those contemplating a migration from Swarm but might also hasten its demise. Will Docker work on a tighter Kubernetes integration in CE/EE?
And one last note — be sure to have the charger for your Mac handy.
Enjoy!

You Might Also Like

The 2025 Wake-Up Call for Engineering Teams

