
Elasticsearch Cluster Setup & Update: Read, Plan, and Test

Setting up and then updating Elasticsearch clusters is a sensitive and error-prone process. As a company that provides ELK (Elasticsearch, Logstash, and Kibana) as a service, we know a thing or two about the process because we invest a lot of engineering time to make sure that our Elasticsearch version and plugins are always up to date.
So, to help those who are maintaining their own Elasticsearch installations, I wanted to provide a quick checklist of tips that DevOps engineers and system administrators need to remember when they upgrade Elasticsearch clusters. In a nutshell, it comes down to a three-pronged process: Read, Plan, and Test.
Reading Before Your Update
It’s crucial to read before you start to plan. First, look at the Elasticsearch documentation relevant for upgrades — it’s pretty straightforward. But remember this rule-of-thumb: Minor version changes (from 2.X to 2.Y) support rolling upgrades (one node at a time), but major version updates (from 1.X to 2.X) require full cluster restarts.
Second, one should always consult the breaking changes pages (see the right-hand sidebar) that are relevant to every version that is being upgraded. Elastic provides the basic steps for rolling upgrades as well as full cluster upgrades in their documentation. Here, I will walk you through some of the finer points to consider when upgrading your cluster and try to help you to avoid some of the mistakes that we have learned from the hard way.
Planning Your Cluster Update
The first thing to do when planning your Elasticsearch cluster upgrade is to prepare a cluster inventory. Use a top-to-bottom approach and answer the following questions:
- What types of nodes are you using (master, data, or client)?
- How many of each type are there?
- What plugins and which versions are installed on each node?
- Does your master election configuration (minimum master nodes) make sense?
- Do you have enough disk space on your data nodes in case one of them should have problems?
Answer these questions to acquaint yourself with your cluster. Make sure that you have the best possible knowledge of the starting point of the cluster before the planned upgrade. The information gathered during this inventory is critical in moving forward with the planning.
The next step is to formulate a high-level plan for the upgrade. The first step in this plan is to create data snapshots of your entire cluster (if possible). Depending on your use case, you might be able to take a snapshot of only part of your data, or you might have to take a snapshot of part of the data in advance and then another immediately before the upgrade. Use your best judgment, but be sure to safeguard your data.
Make sure that your target version files or packages are accessible from your cluster, and do not forget to update all of your plugins to their latest versions! You do not want to have a node down and be unable to start it while you scramble to find a version of some plugin at the last minute. (For help, I would refer to Elastic’s upgrade guide.)
Think carefully about the order in which you will upgrade your nodes. We have been bitten in the past by the side-effects of not creating an upgrade-order process carefully. We have upgraded client nodes before data nodes and ended up with very risky “hotspot” data nodes that we were heavily loaded by the client nodes while the upgrade was in progress because there were not enough upgraded data nodes to share the load.
We recommend an upgrade order of master, data, and then client nodes, but use your own judgment and do a test beforehand. (Depending on the version from which you are migrating, you will need to aware of these specific changes.) Another useful upgrade pattern that we have been using it to create a new cluster and migrate the data to the new cluster instead of upgrading existing nodes.
Testing Your Cluster Upgrade
Staging is where you want to find any problems — not production. It is also where you can streamline your process in terms of risk management, time, and cost.
I recommend setting up a staging cluster for the purpose of testing the upgrade procedure. Any node type that you have in your target cluster should be represented in your testing cluster, but the quantity can be lower. In most cases, there is no need for more than three master nodes, two client nodes, and a few data nodes (depending on your replication scheme). If there are multi-purpose nodes in your target cluster, they should be represented in testing as well.
Use the snapshots created from your target cluster to load data into your testing cluster. If your target cluster has a high load, you should also simulate this load against your testing cluster while practicing your upgrade procedure.
Make sure your testing cluster (and your plugins!) is the same version as your target cluster, and try to use machines with performance characteristics as similar to your target cluster as possible. (Tip: If you are upgrading from any version above 1.6, use of the synced-flush feature to place markers on your shards and significantly speed up your whole upgrade process.)
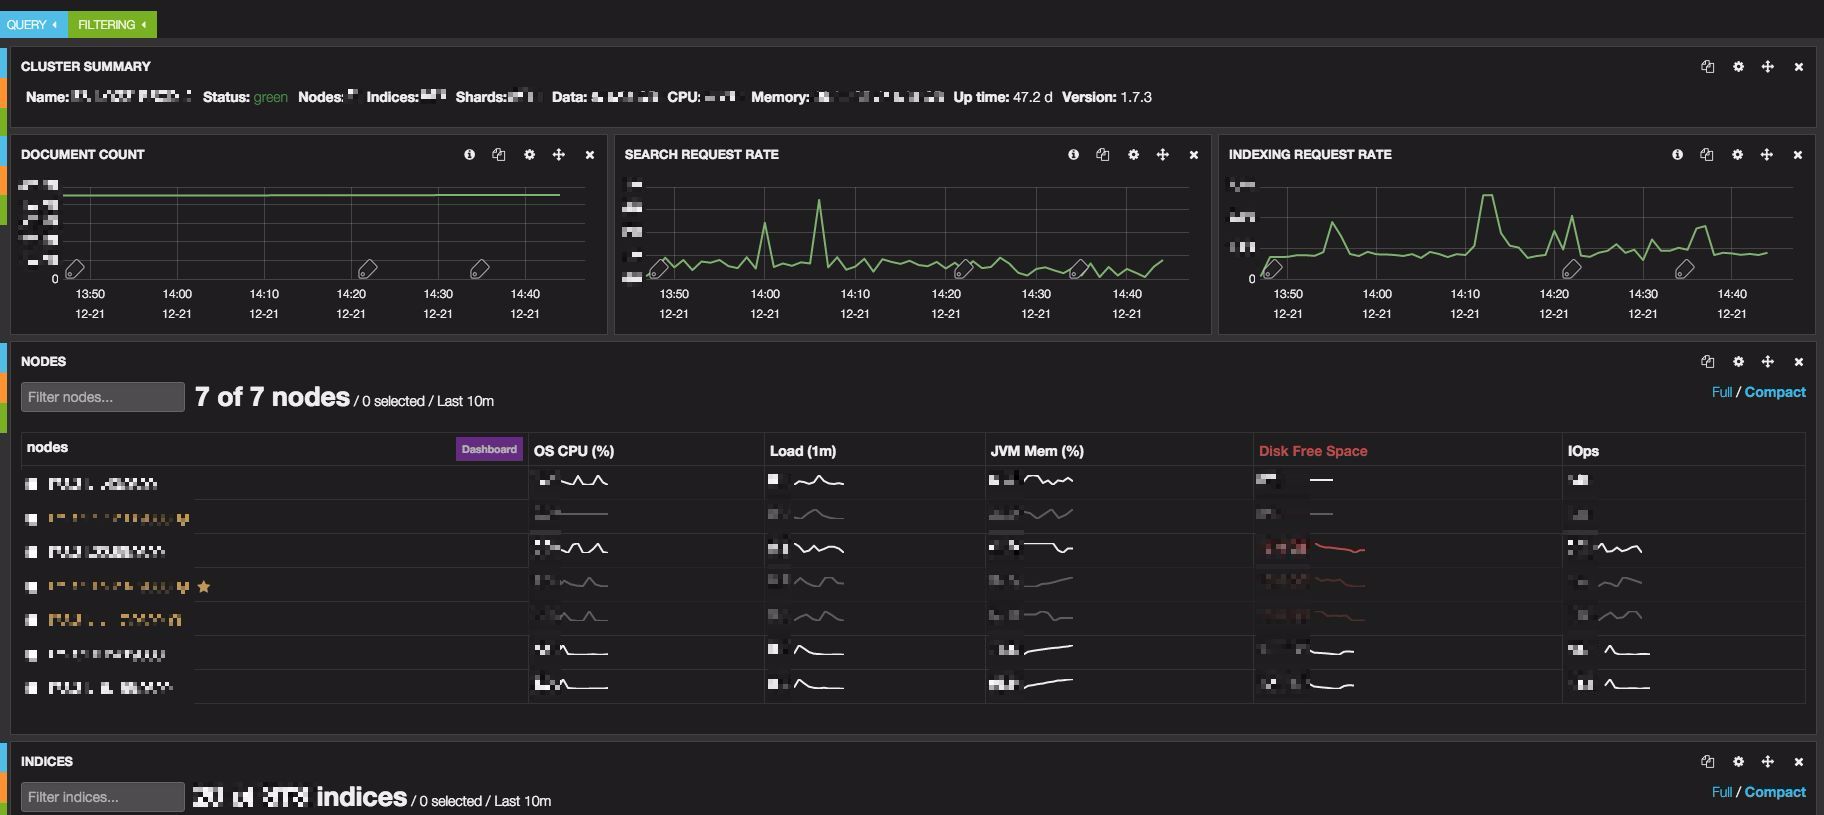
While you are testing your upgrade, make sure to monitor your cluster. Use the common measuring and monitoring tools with which you are comfortable, and try to mimic your end-users’ client connections and use-cases to measure the effect of the various upgrade steps on their perceived experience.
Here are some starting points for where to look:
- Elasticsearch logs. Make sure to follow up on any messages that are out of the ordinary in your Elasticsearch log files as your processes come up after a restart with the new version, and as the upgrade progresses
- Marvel. Make sure you look at CPU usage, load, disk usage, shard relocation, and JVM Heap usage
- Network usage
You might also want to freshen up on your manual shard relocation technique — and possibly automate it. We have found it to be sometimes useful in some edge cases. In addition, Be sure to look out for reports of timeouts, excessive load (of any kind), or any stress signals your cluster may be exhibiting because these tend to be precursors to Elasticsearch node disconnects.
More on the subject:
As you can see, Elasticsearch can be very difficult to install and manage — especially when the software is part of an entire ELK Stack deployment. I hope these tips will help.
What would other recommendations on Elasticsearch setup and cluster updating you add? I invite your thoughts in the comments below.
You Might Also Like
What are AWS EC2 Instances? A Tutorial for EC2 Metrics Shipping with Logz.io

What to Expect from DevOps in 2021
Get started for free
Completely free for 14 days, no strings attached.